Github使用 GitHub Actions 实现博客自动化部署2.0
微尘第一步
第二步
- 新建一个 blog-anzhiyu 仓库(源码存放,后面改私库)
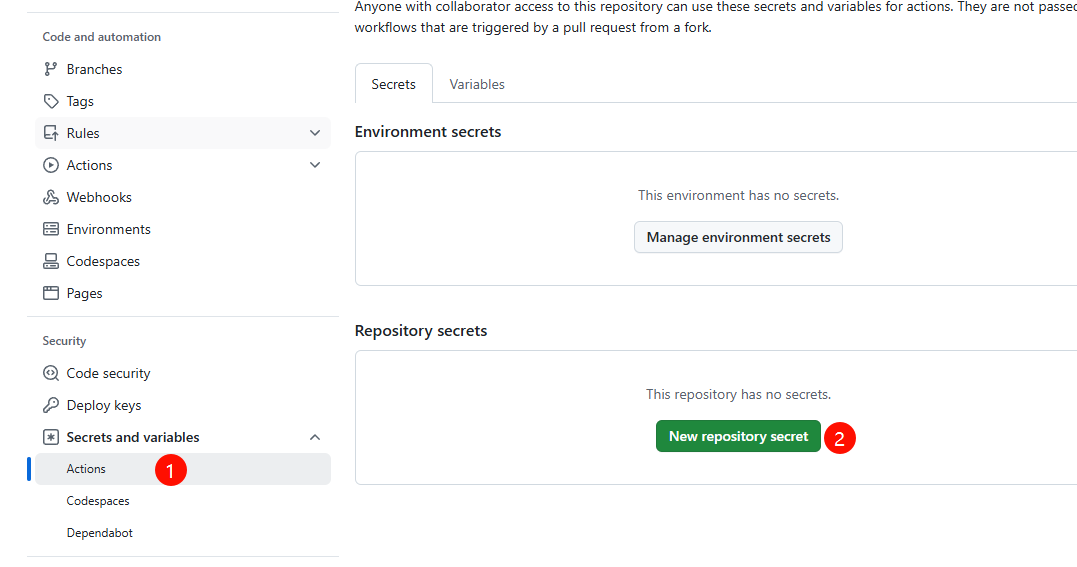
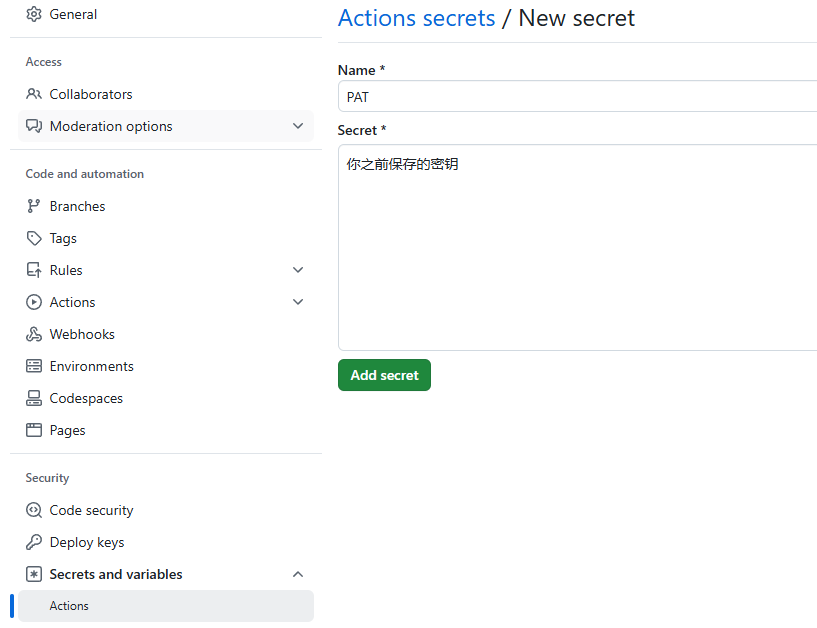
- 设置里面新增变量
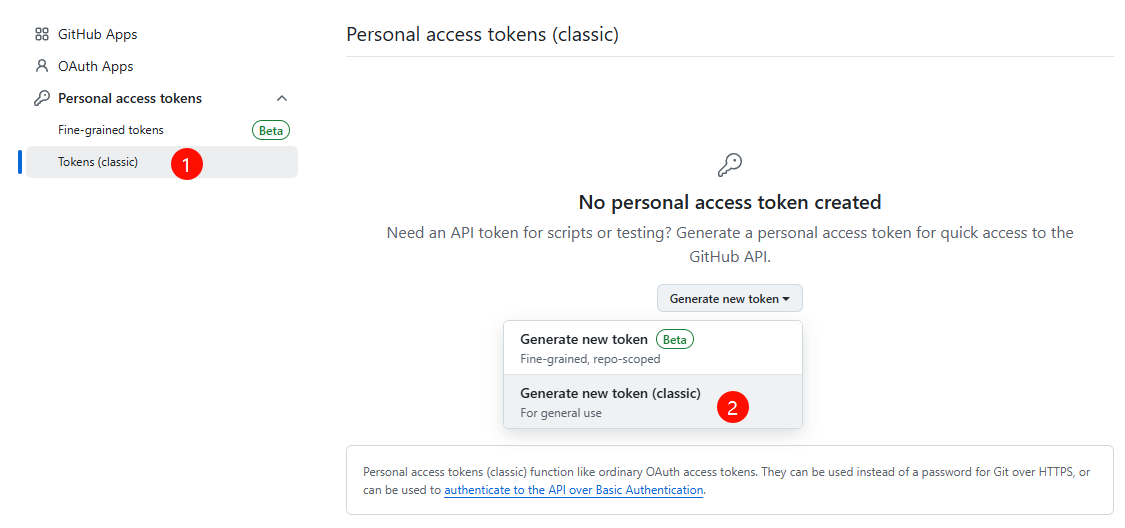
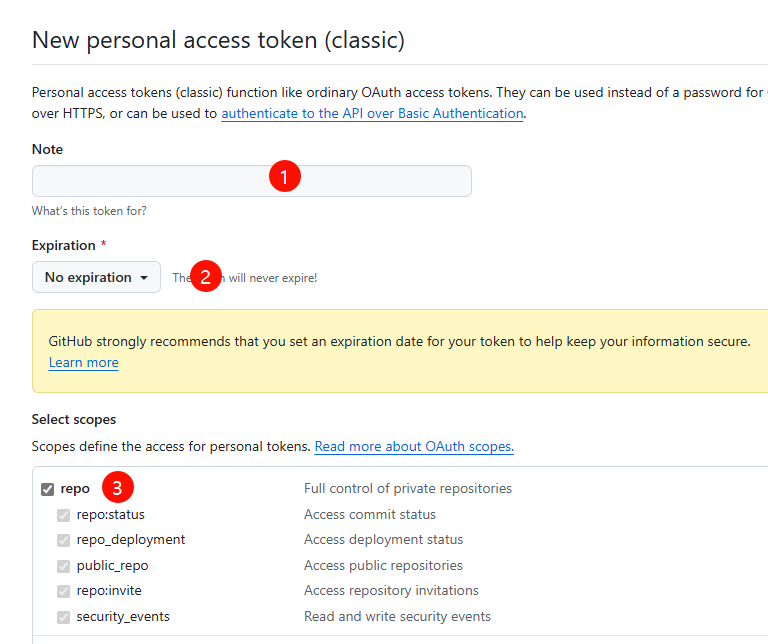
- 再新建一个 blog-anzhiyu-Public(生成的静态文件)
blog-anzhiyu 中新建 themes/anzhiyu/1,blog-anzhiyu 中新建 .github/workflows/main.yml
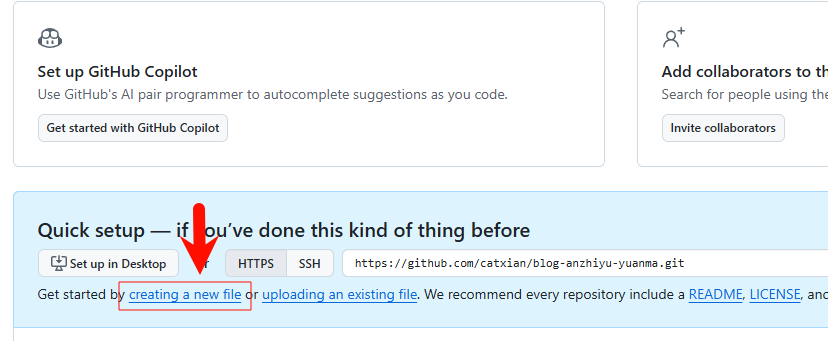

- 然后用客户端把库克隆到本地,把
themes 这个删除,.github 别删除,把你本地备份好的数据全丢进去,编辑一下 .github/workflows/main.yml
- 搜索
catxian/blog-anzhiyu-Public 换成 你自己 的用户名和仓库名
1
2
3
4
5
6
7
8
9
10
11
12
13
14
15
16
17
18
19
20
21
22
23
24
25
26
27
28
29
30
31
32
33
34
35
36
37
38
39
40
41
42
43
44
45
46
47
48
49
50
51
52
53
54
55
56
57
58
59
60
61
62
63
| name: 自动构建
on:
push:
branches:
- main
jobs:
deploy:
runs-on: ubuntu-latest
env:
TZ: Asia/Shanghai
steps:
- name: 检查源仓库分支
uses: actions/checkout@v3
with:
ref: main
fetch-depth: 0
- name: 恢复文件修改时间
run: |
find source -name '*.md' | while read file; do
touch -d "$(git log -1 --format="@%ct" "$file")" "$file"
done
- name: 安装 Node.js
uses: actions/setup-node@v3
with:
node-version: "20.x"
- name: 安装 Hexo
run: |
npm install -g hexo-cli
- name: 缓存 node 模块
id: cache-node-modules
uses: actions/cache@v3
with:
path: node_modules
key: ${{ runner.os }}-node-modules-${{ hashFiles('**/package-lock.json') }}
restore-keys: |
${{ runner.os }}-node-modules-
- name: 安装依赖
if: steps.cache-node-modules.outputs.cache-hit != 'true'
run: |
npm install --save
- name: 生成静态
run: |
node link.js
hexo generate
- name: 部署推送到目标仓库
uses: peaceiris/actions-gh-pages@v3
with:
personal_token: ${{ secrets.PAT }}
publish_dir: ./public
external_repository: catxian/blog-anzhiyu-Public
user_name: "github-actions[bot]"
user_email: "github-actions[bot]@users.noreply.github.com"
full_commit_message: "通过 Github Actions 部署 Hexo 构建"
publish_branch: main
|
第三步
- 客户端直接把整个仓库上传上去
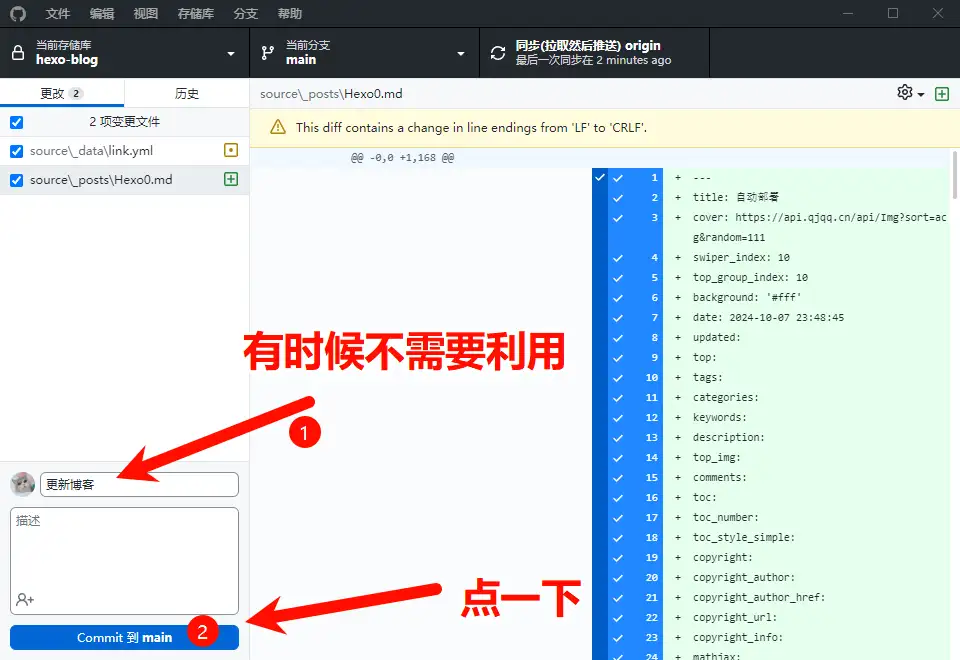
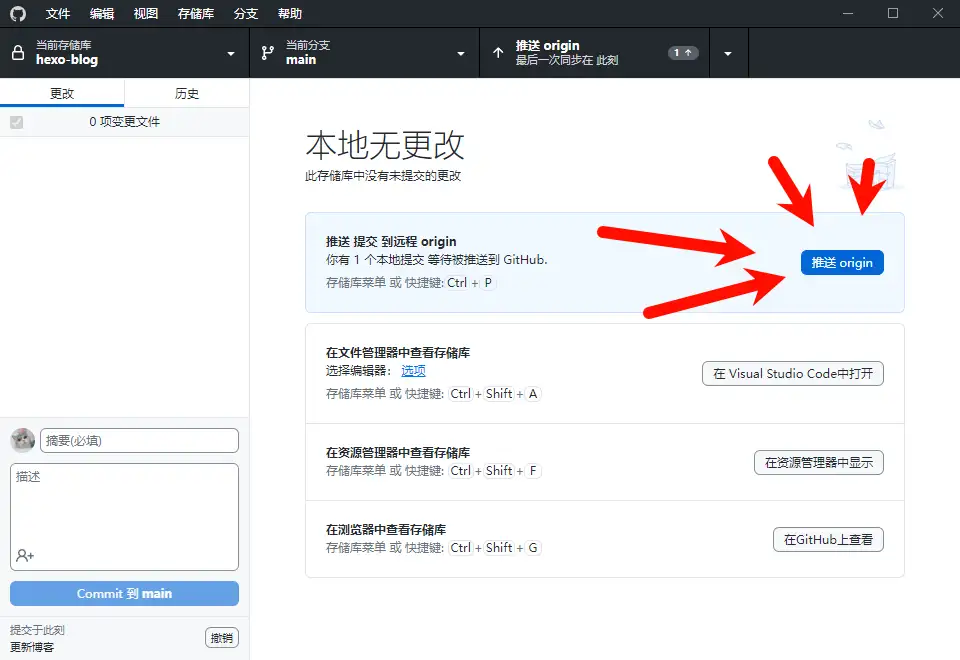
总结加感谢
想部署到 cloudflare 还是 vercel 都可以
使用 Github Action 自动部署 Hexo 博客 | 雷雷的个人博客
本地推送Github Actions再推送到服务器 | 梦爱吃鱼

